

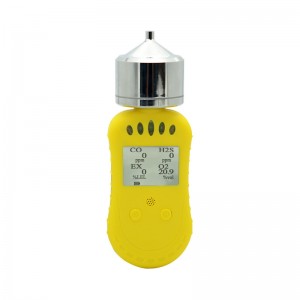
Compound Portable Gas Detector
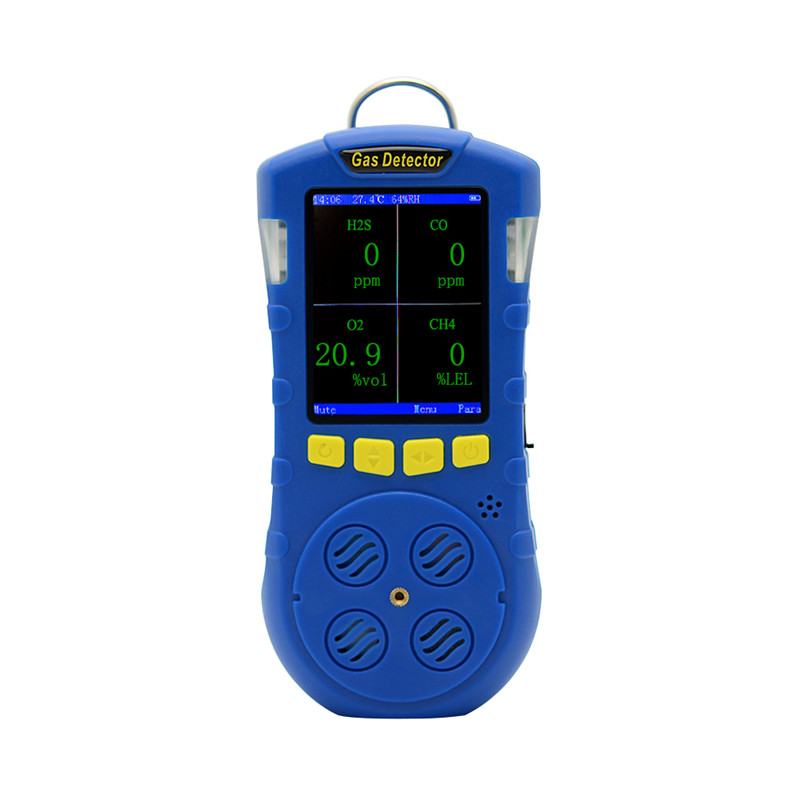


The composite portable gas detector adopts 2.8-inch TFT color screen display, which can detect up to 4 kinds of gases at the same time. It supports the detection of temperature and humidity. The operation interface is beautiful and elegant; it supports display in both Chinese and English. When the concentration exceeds the limit, the instrument will send out sound, light and vibration alarm. With real-time data storage function, and USB communication interface, can connect with the computer to read Settings, derive records and so on.
Use PC material, appearance design conform to ergonomic design.
★ 2.8 inch TFT color screen, 240*320 resolution, support Chinese and English display
★ According to customer requirements, flexible combination for different sensors of composite gas detection instrument, up to 4 kinds of gases can be detected at the same time, can support CO2 and VOC sensors.
★ Can detect the temperature and humidity in the working environment
★ Four buttons, compact size, easy to operate and carry
★ With real-time clock, can be set
★ LCD real-time display for gas concentration and alarm status
★ Display TWA and STEL value
★ Large capacity lithium battery charging, ensure the instrument works continuously for a long time
★ Vibration, flashing light and sound three alarm mode, alarm can be manually silenced
★ Strong high-grade crocodile clip, easy to carry in the process of operation
★ The shell is made of high strength special engineering plastics, strong and durable, beautiful and comfortable
★ With data storage function, mass storage, can store 3,000 alarm records and 990,000 real-time records, can view records on the instrument, but also through the data line connection computer export data.
Basic parameters:
Detection gas: oxygen, carbon dioxide, combustible gas and toxic gas, temperature and humidity, can be customized gas combination.
Detection principle: electrochemical, infrared, catalytic combustion, PID.
Maximum allowable error: ≤±3% f.s.
Response time: T90≤30s (except for special gas)
Alarm mode: sound-light, vibration
Working environment: temperature: -20~50℃, humidity: 10~ 95%rh (no condensation)
Battery capacity: 5000mAh
Charging voltage: DC5V
Communication interface: Micro USB
Data storage: 990,000 real-time records and over 3,000 alarm records
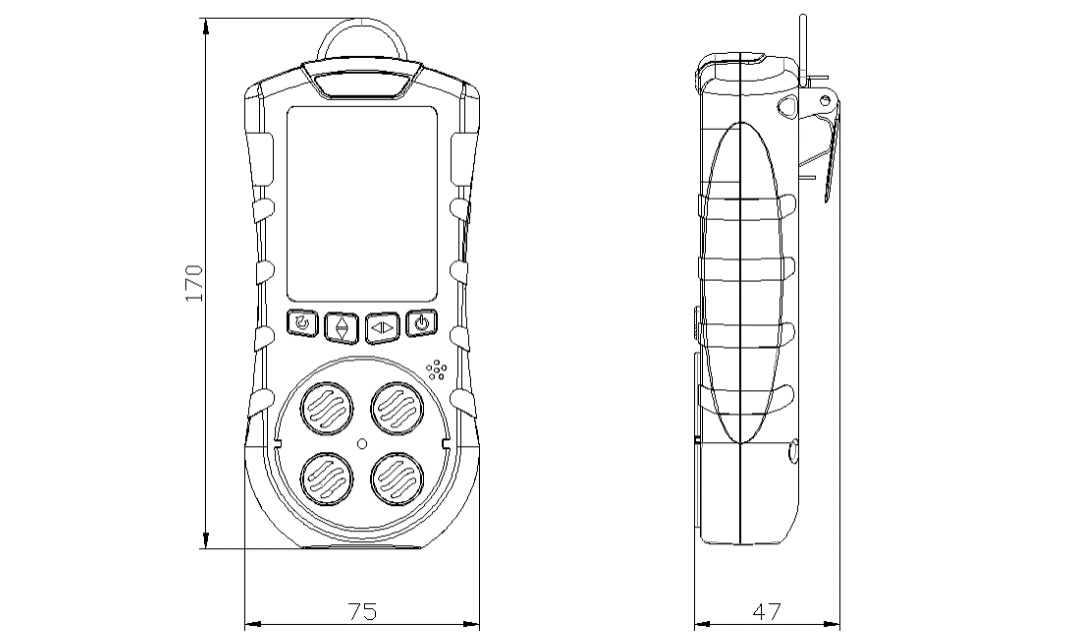
Overall dimensions: 75*170*47 (mm) as shown in Figure 1.
Weight: 293 g
Standard equipped: manual, certificate, USB charger, packing box, back clamp, instrument, calibration gas cover.
The instrument has four buttons and its functions are shown in table 1.The actual function is subject to the status bar at the bottom of the screen.
Table 1 Buttons function
|
Key |
Function |
|
ON-OFF key |
Confirm the setting operation, enter the menu of level 1, and long press on and off. |
|
Left-Right key |
Select to the right, the time setting menu value minus 1, long press the value quickly minus 1. |
|
Up-Down key |
Select to the down, value add 1, long press the value quickly add 1. |
|
Return key |
Back to the previous menu, mute function (real-time concentration display interface) |
The initialization interface is shown in Figure 2. It takes 50s. After the initialization is completed, it enters the real-time concentration display interface.
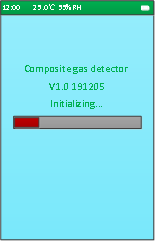
Figure 2 Initialization Interface
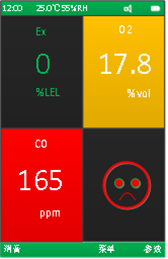
The title bar display time, alarm, battery power, USB connection mark, etc.
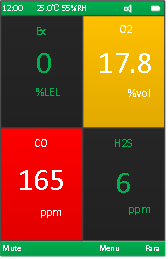
The middle area shows the gas parameters: gas type, unit, real-time concentration. Different colors represent different alarm states.
Normal: Green words on black background
Level 1 alarm: white words on orange background
Level 2 alarm: white words on red background
Different gas combinations have different display interfaces, as shown in Figure 3, Figure 4 and Figure 5.
|
Four Gases |
Three Gases |
Two Gases |
|
|
|
|
|
Figure 3 Four Gases |
Figure 4 Three Gases |
Figure 5 Two Gases |
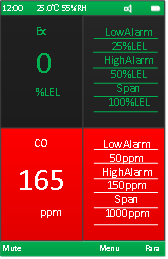
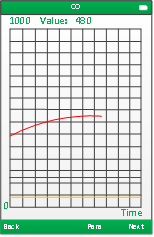
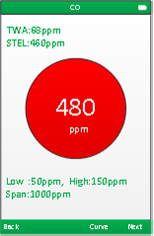
Press the corresponding key to enter a single gas display interface. There are two ways. The curve is shown in Figure 6 and the parameters are shown in Figure 7.
Parameters interface display gas TWA, STEL and other related parameters. STEL sampling period can be set in the system Settings menu.
|
Curve Display |
Parameter Display |
|
|
|
|
Figure 6 Curve Display |
Figure 7 parameters Display |
6.1 System setting
System setting menu as shown in Figure 9.There are nine functions.
Menu theme: set the color collocation
Backlight sleep: sets the time for backlight
Key timeout: set the time for the key timeout to exit to the concentration display screen automatically
Automatic shutdown: set the automatic shutdown time of the system, not on by default
Parameter recovery: recovery system parameters, alarm records and real-time stored data.
Language: Chinese and English can be switched
Real-time storage: sets the time interval for real-time storage.
Bluetooth: turn on or off Bluetooth (optional)
STEL period: STEL sampling period time

Figure 9 System Setting
● Menu Theme
As shown in Figure 10, user can choose any one of the six colors, select the desired theme color, and press ok to save the Settings.

Figure 10 Menu Theme
● Backlight sleep
As shown in Figure 11, can choose normally on, 15s, 30s, 45s,The default is 15s. Off( Backlight is normally on).
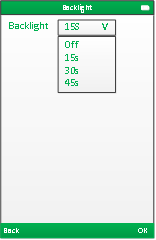
Figure 11 Backlight sleep
● Key Timeout
As shown in Figure 12, can choose 15s, 30s, 45s, 60s.The default is 15s.

lFigure 12 Key Timeout
● Automatic shutdown
As shown in Figure 13,can choose not on,2hours,4hours,6hours and 8hours,the default is not on(Dis En).

Figure 13 Automatic shutdown
● Parameter Recovery
As shown in Figure 14, can choose system parameters, gas parameters and clear record (Cls Log).

Figure 14 Parameter Recovery
Select system parameter and press ok, enter the interface of determining recovery parameters, as shown in Figure 15. After confirming the execution of the operation, the menu theme, backlight sleep, key timeout, automatic shutdown and other parameters will return to the default values.
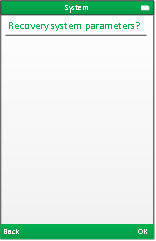
Figure 15 Confirm parameter recovery
Select the type of gases to be recovered, as shown in Figure 16, press ok
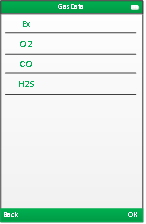
Figure 16 Select gas type
Display the interface of determining recovery parameters as shown in Figure 17., press ok to perform the restore operation

Figure 17 Confirm parameter recovery
Select the record to recover as shown in Figure 18, and press ok.
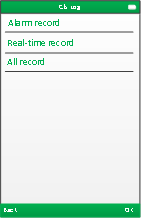
Figure 18 Clear record
The interface of "ok" is shown in Figure 19. Press "ok" to execute the operation
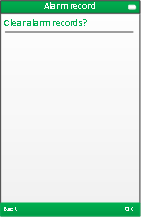
Figure 19 Confirm Clear record
● Bluetooth
As shown in Figure 20, you can choose to turn Bluetooth on or off. Bluetooth is optional.
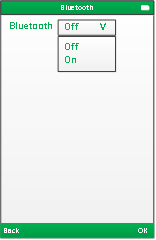
Figure 20 Bluetooth
● STEL Cycle
As shown in Figure 21, 5~15 minutes is optional.
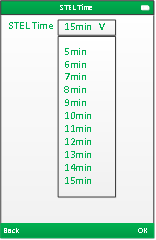
Figure 21 STEL Cycle
6.2Time setting
As shown in Figure 22
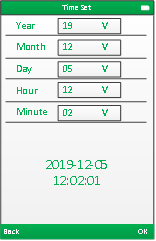
Figure 22 Time setting
Select the time type to be set, press the OK key to enter the parameter setting state, press the up and down keys +1, press and hold the fast +1. Press OK to exit this parameter setting. You can press the up and down keys to select other settings. Press the back key to exit the menu.
Year: 19 ~ 29
Month: 01 ~ 12
Day: 01 ~ 31
Hours: 00 ~ 23
Minutes: 00 ~ 59
6.3 Alarm setting
Select the gas type to be set as shown in Figure 23, then select the alarm type to be set as shown in Figure 24, and then enter the alarm value as shown in Figure 25 to confirm. The setting will be displayed below.
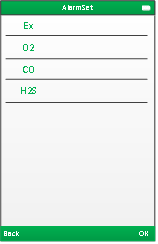
Figure 23 Select gas type
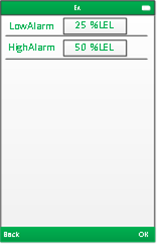
Figure 24 Select alarm type
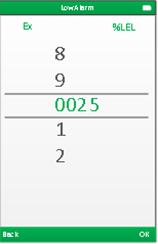
Figure 25 Enter alarm value
Note: For safety reasons, the alarm value can only be ≤ factory set value, oxygen is a primary alarm and ≥ factory set value.
6.4 Storage record
The storage records are divided into alarm records and real-time records, as shown in Figure 26.
Alarm record: including power on, power off, response alarm, setting operation, time of gas alarm status change, etc. Can store 3000+ alarm records.
Real-time recording: The gas concentration value stored in real time can be queried by time. Can store 990,000+ real-time records.
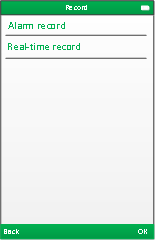
Figure 26 Storage record type
The alarm records first display the storage status as shown in Figure 27. Press OK to enter the alarm records viewing interface as shown in Figure 28. The latest record is displayed first. Press the up and down keys to view previous records.
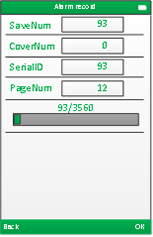
Figure 27 alarm record summary information
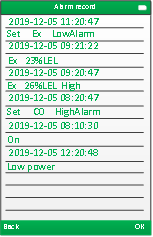
Figure 28 Alarm records
The real-time record query interface is shown in Figure 29. Select the gas type, select the query time range, and then select the query. Press the OK key to query the results. Query time is related to the number of data records stored. The query result is shown in Figure 30. Press the up and down keys to page down, press the left and right keys to turn up the page, and press and hold the button to quickly turn the page.
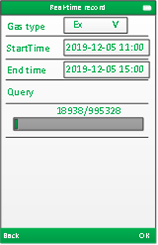
Figure 29 real-time record query interface
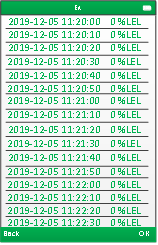
Figure 30 real time recording results
6.5 Zero correction
Enter the calibration password as shown in Figure 31, 1111, press ok

Figure 31 calibration password
Select the gas type requiring zero correction, as shown in Figure 32,press ok
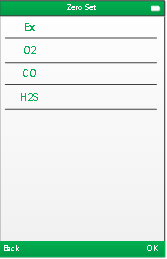
Figure 32 selecting gas type
As shown in Figure 33, press ok to perform zero correction.
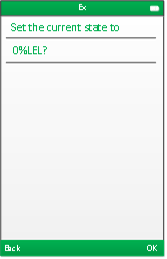
Figure 33 confirm operation
6.6 Gas calibration
Enter the calibration password as shown in Figure 31, 1111, press ok
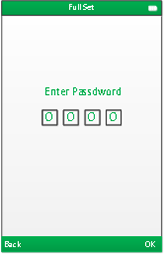
Figure 34 calibration password
Select the gas type requiring calibration, as shown in FIG. 35,press ok
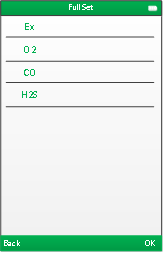
Figure 35 select gas type
Enter the calibration gas concentration as shown in Figure 36, press ok to enter the calibration curve interface.
As shown in Figure 37, the standard gas is passed in, the calibration will be performed automatically after 1 minute. The calibration result will be displayed in the middle of the status bar.
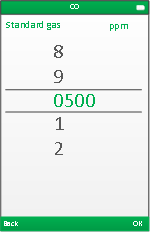
Figure 36 input standard gas concentration
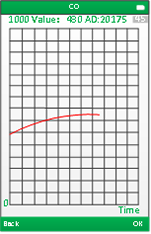
Figure 37 calibration curve interface
6.7 Unit setting
The unit setting interface is shown in Figure 38. You can switch between ppm and mg/m3 for some toxic gases. After the switch, the primary alarm, secondary alarm, and range will be converted accordingly.
Symbol × is displayed after gas, is to say that the unit cannot be switched.
Select the gas type to be set, press OK to enter the selection state, press the up and down keys to select the unit to be set, and press OK to confirm the setting.
Press Back to exit the menu.
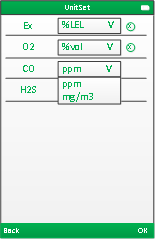
Figure 38 Unit Set Up
6.8 About
Menu setting as Figure 39
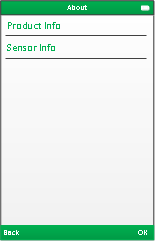
Figure 39 About
Product info: display some basic specifications about the device
Sensor info: display some basic specifications about the sensors
● Device information
As Figure 40 display some basic specifications about the device
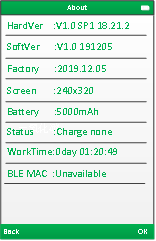
Figure 40 Device information
● Sensor information
As show Figure. 41, display some basic specifications about the sensors.
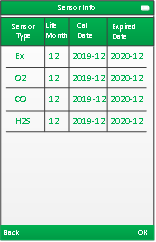
Figure 41 Sensor Information
The USB port has communication function, use USB transfer to Micro USB wire to connect the detector to computer. Install the USB driver( in the package installer), Windows 10 system does not need install it. After install, open the configuration software, select and open the serial port, it will display the real time gas concentration on the software.
The software can read the real-time concentration of gas, set the parameters of gas, calibrate the instrument, read the alarm record, read the real-time storage record, etc.
If there is no standard gas, please do not enter the gas calibration operation.
● Some gas value is not 0 after starting.
Due to the gas data not fully initialized, it need wait for a moment. For ETO sensor, when the battery of the instrument is out of power , then get charged and restart, it needs to wait for several hours.
● After used several months, the O2 concentration is lower in normal environment.
Get into gas calibration interface and calibrate the detector with concentration 20.9.
● The computer cannot recognize the USB port.
Check whether the USB drive is installed and the data cable is 4-core.
The sensors are with limited service life; it cannot test normally and needs be changed after use up its service time. It needs be calibrated every half a year within the service time to ensure the accuracy. Standard gas for calibration is necessary and a must.
● When charging, please keep the instrument shutdown to save charging time. In addition, if switch on and charging, the sensor might be affected by the difference of charger (or the difference of charging environment), and in serious cases, the value might be inaccurate or even alarm.
● It needs 4-6 hours for charging when the detector is auto-power off.
● After get full charged, for combustible gas, it can work 24hours continuously (Except for alarm, because when it alarms, it also vibrate and flashing which consumes electricity and the working hours will be 1/2 or 1/3 of the original.
● When the detector is with lower power, it will auto-power on/off frequently, in which case it needs to be charged in time.
● Avoid using the detector in a corrosive environment.
● Avoid contacting with water.
● Charge the battery every one to two months to protect its normal life if it is not used for a long time.
● If the detector crashed or cannot be started during use, please rub the reset hole on the top of the instrument with a toothpick or thimble to remove the accidental crash
● Please be sure to start the machine in normal environment. After starting, take it to the place where the gas is to be detected after the initialization completed.
● If the record storage function is needed, it is better to enter the menu calibration time before the device initialization is completed after starting up, so as to prevent the time confusion when reading the record, otherwise, calibrating time is not needed
|
Detected gas |
Measure Range | Resolution | Low/High Alarm Point |
|
Ex |
0-100%lel | 1%LEL | 25%LEL/50%LEL |
|
O2 |
0-30%vol | 0.1%vol | <18%vol, >23%vol |
|
H2S |
0-200ppm | 1ppm | 5ppm/10ppm |
|
CO |
0-1000ppm | 1ppm | 50ppm/150ppm |
|
CO2 |
0-5%vol | 0.01%vol | 0.20%vol /0.50%vol |
|
NO |
0-250ppm | 1ppm | 10ppm/20ppm |
|
NO2 |
0-20ppm | 1ppm | 5ppm/10ppm |
|
SO2 |
0-100ppm | 1ppm | 1ppm/5ppm |
|
CL2 |
0-20ppm | 1ppm | 2ppm/4ppm |
|
H2 |
0-1000ppm | 1ppm | 35ppm/70ppm |
|
NH3 |
0-200ppm | 1ppm | 35ppm/70ppm |
|
PH3 |
0-20ppm | 1ppm | 5ppm/10ppm |
|
HCL |
0-20ppm | 1ppm | 2ppm/4ppm |
|
O3 |
0-50ppm | 1ppm | 2ppm/4ppm |
|
CH2O |
0-100ppm | 1ppm | 5ppm/10ppm |
|
HF |
0-10ppm | 1ppm | 5ppm/10ppm |
|
VOC |
0-100ppm | 1ppm | 10ppm/20ppm |
|
ETO |
0-100ppm | 1ppm | 10ppm /20ppm |
|
C6H6 |
0-100ppm | 1ppm | 5ppm/10ppm |
Note: The table is for reference only; the actual measurement range is subject to the actual display of the instrument.
Related products
-
Composite portable gas detector
System Description System configuration 1. Table1 Material List of Composite portable gas detector Portable pump composite gas detector USB Charger Certification Instruction Please check materials immediately after unpacking. The Standard is necessary accessories. The Optional is can be choose according to your needs. If you have no need to calibration, set the alarm parameters, or rea...
-
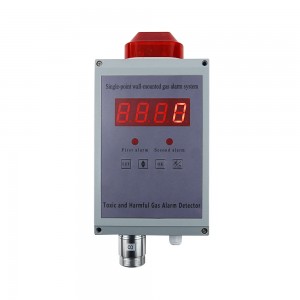
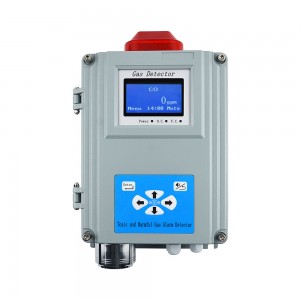
Single-point Wall-mounted Gas Alarm
Structure chart Technical parameter ● Sensor: electrochemistry, catalytic combustion, infrared, PID...... ● Responding time: ≤30s ● Display mode: High brightness red digital tube ● Alarming mode: Audible alarm -- above 90dB(10cm) Light alarm --Φ10 red light-emitting diodes (leds) ...
-
Compound single point wall mounted gas alarm
Product Parameters ● Sensor: Combustible gas is catalytic type, other gases are electrochemical, except special ● Responding time: EX≤15s; O2≤15s; CO≤15s; H2S≤25s ● Work pattern: continuous operation ● Display: LCD display ● Screen Resolition:128*64 ● Alarming mode: Audible & Light Light alarm -- High intensity strobes Audible alarm -- above 90dB ● Output control: relay output with two wa...
-
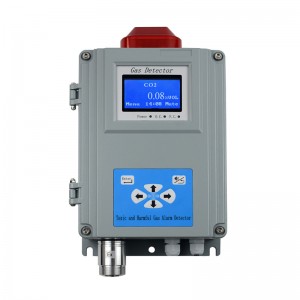
Single-point Wall-mounted Gas Alarm (Carbon dio...
Technical parameter ● Sensor: infrared sensor ● Responding time: ≤40s (conventional type) ● Work pattern: continuous operation, high and low alarm point(could be set) ● Analog interface: 4-20mA signal output [option] ● Digital interface: RS485-bus interface [option] ● Display mode: Graphic LCD ● Alarming mode: Audible alarm -- above 90dB; Light alarm -- High intensity strobes ● Output control: relay o...
-
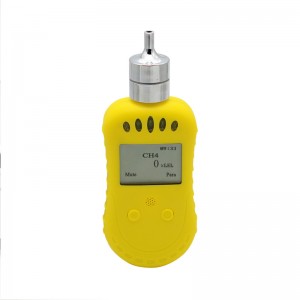
Portable pump suction single gas detector
System Description System configuration 1. Table1 Material List of Portable pump suction single gas detector Gas Detector USB Charger Please check materials immediately after unpacking. The Standard is necessary accessories. The Optional can be chosen according to your needs. If you have no need to calibrate, set the alarm parameters, or read the alarm record, don’t purchase the optional acc...
-
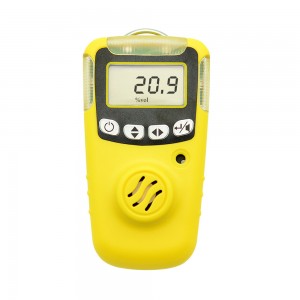
Single Gas Detector User’s
Prompt For security reasons, the device only by suitably qualified personnel operation and maintenance. Prior to the operation or maintenance, please read and fully manage all solutions to these instructions. Including operations, maintenance of equipment and process methods. And a very important safety precautions. Read the following Cautions before using the detector. Table 1 Cautions Cautions ...


